
Nectar’s Presets are designed to give you a quick starting point for your own projects.
Every vocalist is different so no one preset will always work well for your audio. However we have attempted to provide a wide range of Presets that will help you find a good starting point for your own material.
The Preset Manager tells Nectar what style of vocals you're trying to produce and automatically sets the appropriate values for all the controls to achieve that sound. Click the Preset Display at the bottom of the Nectar interface to open the Preset Manager. We’ve organized presets into genre categories that will let you search easily for presets for every purpose. Because every vocal track is different, we’ve aimed to give you a lot of starting points so that you can choose the best one for your project.
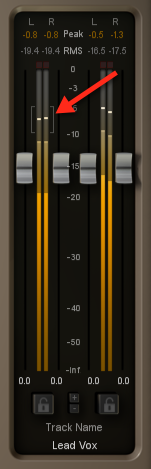
Setting your input level is important when selecting a preset as it will sound drastically different if your input level is too loud or quiet. In order to ensure that you have a good neutral levels as a starting point, we recommend setting Nectar’s input level so that the input meter is peaking within the recommended range bracket.
Learn more about the Input and Output Gain of Nectar here.
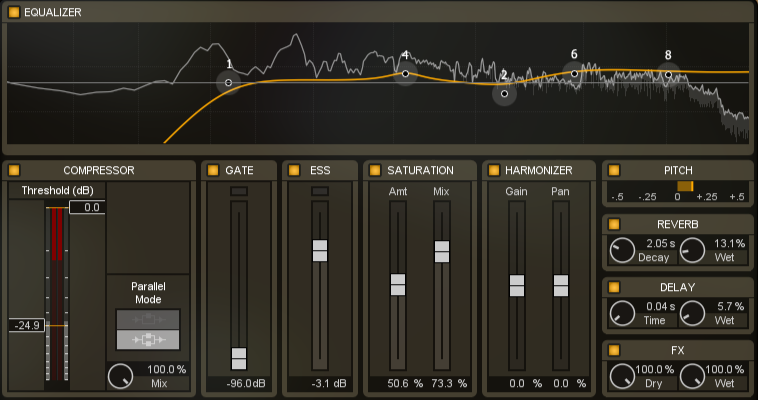
When you’ve found a Preset that has what your track needs, further adjust the controls to your liking to define your own unique sound. The Overview Panel view gives you instant access to the most relevant controls of Nectar’s modules. Quickly adjust the settings of a given module to tailor the sound or quickly enable or disable modules.
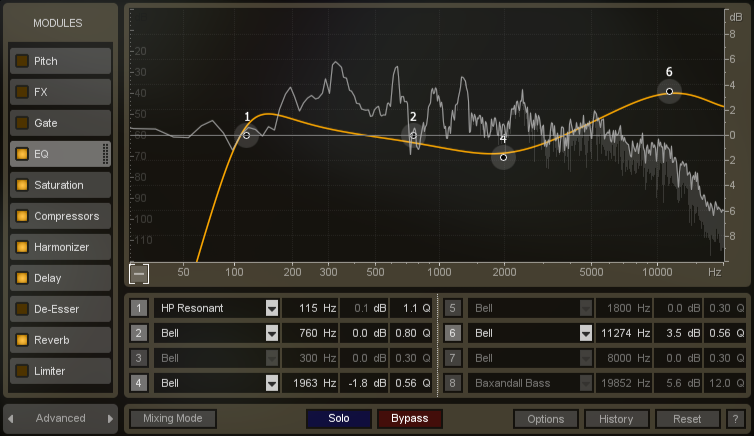
Once you’ve found an appropriate Preset and adjusted some module settings to your taste from the Overview Panel, have a look at the individual modules in the Advanced View. In each module’s Advanced view you have access to deeper settings for a more customized sound as well as metering which can assist you when making adjustments.